This plugin has been retired. It will no longer be supported or updated.
The Custom Background Plugin allows you to customize any WordPress theme by adding in your own background images and colors right from your WordPress Dashboard. You can create any number of backgrounds, and assign them to individual posts, post categories, or to your entire blog.
[Most recent Shiba Backgrounds updates]
Sept 9th, 2012 – Release 1.5
- Updated plugin for WordPress 3.4.
- Fixed Cheatin’uh error.
- Enable theme switching.
- Cleaned up how background data is stored.
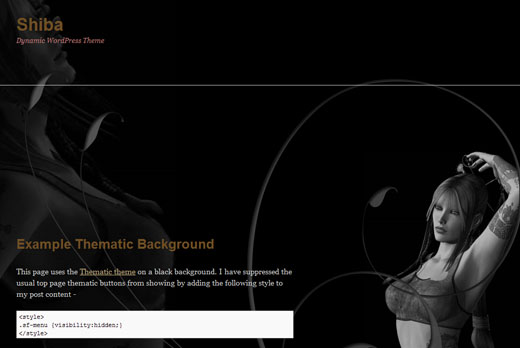
Here are some example pages with customized backgrounds. Themes used include Twenty Ten, Thematic, and Smooth. All pages were created using the Shiba Custom Background Plugin.
How to Get Shiba Backgrounds Plugin
1. Create a Custom Background
You can flexibly customize your theme by creating background objects. Background objects are similar to your WordPress galleries. They allow you to group together a set of images that you can then use as backgrounds for your theme.
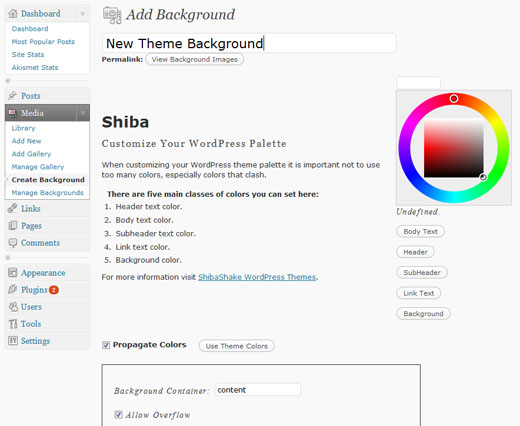
Create a background object by going to Backgrounds >> Add New (Or Media >> Create Background in WordPress 2.9). Enter in a title for your background object and then click on Publish (Update Background in 2.9).
Congratulations – you have successfully created your first background object.
2. Assign Theme Colors
Background objects can also contain theme colors, in particular – background, text, link text, header, and sub-header colors.
The Edit Background screen gives you a color selector and a row of buttons for selecting the five different classes of colors. Click on the text class you want to select the color for, then select the color using the color-wheel.
As you select different colors, the text and background colors of the example paragraph text (to the left) will change. This gives you a rough idea of how your blog colors will look when combined together. Once you are happy with your color choices, click on the Update Background button. Your color choices will be saved, and be reflected in your assigned blog backgrounds.
The Propagate Colors checkbox will propagate the background and body text colors to all child containers within your theme.
If this box is left unchecked, the colors you just assigned will only be set for the body of your web page. As a result, they may get overridden by more specific color settings assigned by your current theme.
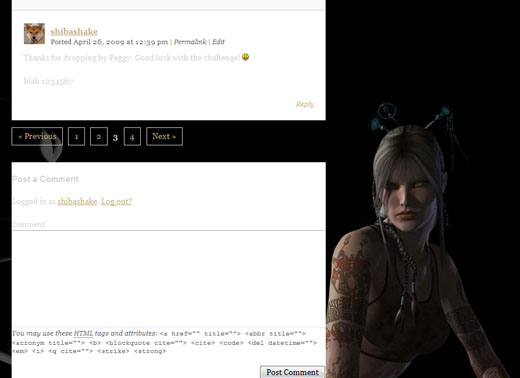
For example, the screenshot below shows the comments area for the example Thematic background with propagate colors turned off. As you can see, the comments area is now colored using the original Thematic theme colors.
The Use Theme Colors button will discard all colors associated with your background object and revert back to using your current theme colors.
In general, you either want to propagate colors, or just use your default theme colors. You may also set colors for only the components that you want. For example, you may just choose to set the background color and leave the other colors blank. In this case, the plugin will use your defined background color, and revert to original theme colors for all the other components.
Note – The plugin only sets colors for common HTML and WordPress blog tags. Some themes may use non-standardized tags, which will be left untouched by the plugin.
3. Load Background Images
You can load images into your background object by clicking on the Add New button towards the bottom of the background edit screen.
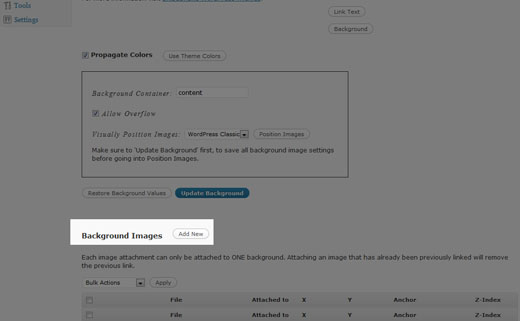
Clicking on the Add New button will bring up a pop-up that allows you to include images either from your local computer, or from your blog Media Library.
The interface here is the same as the one used for inserting images into your blog posts. If you are loading images from your local computer, new attachment objects will be created for each image and added to your WordPress Media Library. Once you are done with the image uploads, click on the Save All Changes button and you will be returned to your Edit Background screen.
To include an image from your Media Library, click on the Media Library tab. Once you have selected an image that you want, click on the Insert into Post button. This will insert the image into your background object.
Note – An image can only be inserted into ONE background object. If you insert an already attached image to a new background object, the previous attachment will be removed. This also applies to post attachments. I.e., if you attach an image to a background object, its previous post attachment (if any) will also be replaced.
This is because an image/attachment can only be attached to ONE parent object at a time.

4. Position Background Images
Background images are positioned relative to a div container of your choice. Pick the container that encapsulates the main content of your blog. This is generally the content div in most WordPress themes.

Setting your background container to content will anchor all your background images to it, so that when you resize your browser window, all background images will move in relation to your blog content.
Try to use JPG images as much as possible to save on load time. A transparent PNG may add a nice touch from time to time, but they are much larger in size and will increase page load time.
The Allow Overflow option enables your background images to expand beyond their parent container. Checking this option will give your background a more continuous look.
5. All Done!
Now you are all done with your background object – time to show-off your awesome new WordPress theme design!
You may assign your new background object to posts, pages, tags, or categories. There should be a new drop-down menu in Edit Post, Edit Page, Edit Tag, and Edit Category that allows you to do this. Simply select the background object of your choice and update your post, page, tag, or category object.
You may also assign a background object to your entire blog.
define('SHIBA_BACKGROUND_DEFAULT', <background object id>);
Just insert the definition above into your main WordPress theme functions.php file.
With the Shiba Custom Background Plugin, you can easily create compelling, personalized, and unique backgrounds for your WordPress blog. Have fun creating new backgrounds and share some of your results with us!
Shiba Custom Background Updates
Shiba Backgrounds Release 1.4
April 22nd, 2011
- Updated plugin for WordPress 3.1. Plugin also works in WordPress multisite mode.
Shiba Backgrounds 1.2
July 13th, 2010
- Updated plugin for WordPress 3.0. Plugin also works in WordPress multisite mode.
- Background objects now use custom post types and taxonomy meta-data tables. This creates a cleaner and more secure interface.
- Cleaned up PHP notices.
Shiba Backgrounds 1.1
April 5th, 2010
- Added ability to remove default theme background images.
- Added ability to specify an ignore div list.
- All plugin functions are now encapsulated within a wrapper class.
- Plugin is more modular and more secure.



Awesome plugin! I am having a problem with WP version 3.4.1 though. When I try to edit the background object and then upload a background image, I get a page that just says…
Cheatin’ uh?
I had the same problem with the theme options panel of my premium theme but the theme developer had a solution that worked for that part. I am still getting the error with your plugin though. Your help will be greatly appreciated. I desperately need help fixing this problem ASAP for a client on a deadline.
I am starting to work on updating my plugins for 3.4 but it will take a while to go through them all.
Cheatin’uh? issue has to do with additional checks that have been put into the media library pop-up and media-library >> New menus, in particular to the post_id that is passed in. I have been using the post_id to act as a context variable, and that is no longer allowed. I will post something when I find a good fix.