Create Widgets in Your WP Theme
Widgets are an extremely powerful feature of WordPress blogs. If you use a widget-ready WP theme, you can add a variety of plug-ins or WordPress-ready features such as Recent Posts, Recent Comments, Calendar, Search, and much more by using the simple drag and drop widget interface within the WordPress dashboard.
This article describes how you can add a flexible multiple-column widget into your WP theme. Most WP theme widgets are placed on a sidebar that is very tall but not very wide. In such a layout, there is usually a single column of widgets, and each widget is placed on its own row.
However, it is also useful to place widgets in the header and footer areas of your blog. Unlike the sidebar, however, these areas tend to be wide but not very tall. In these instances you want a multi-column WP widget layout.

Multi-Column WP Theme Widgets
The screen-shot below shows a multi-column WP theme widget area. There are a maximum of three columns, but it will expand and shrink according to the number of widgets you have placed in the area. If there is only one widget, it will expand to take up the entire space; if there are two widgets, it will divide the space into two columns; and if there are three of more widgets, it will use a three column layout like the one shown.


Multi-column WordPress theme widget area.
Creating a multi-column widget area is all in the styling of the elements within your WP theme. Here is a step by step on how to add a multi-column widget area into your WP theme –
1. Register a theme widget area with WordPress
Go into the functions.php file of your theme. If your theme is already widget enabled, then there will be one or more register_sidebar function calls. The PHP code will look something like this –
functions.php
if ( function_exists('register_sidebar') ) {
	register_sidebar(array(
		'name' => 'sidebar',
        'before_widget' => '<li id="%1$s" class="widget %2$s">',
        'after_widget' => '</li>',
        'before_title' => '<div class="widget-title">',
        'after_title' => '</div>',
    ));
}
You just need to register a widget area by adding a new register_sidebar statement as is shown below –
functions.php
if ( function_exists('register_sidebar') ) {
	register_sidebar(array(
		'name' => 'sidebar',
        'before_widget' => '<li id="%1$s" class="widget %2$s">',
        'after_widget' => '</li>',
        'before_title' => '<div class="widget-title">',
        'after_title' => '</div>',
    ));

// Register new widget area
$header_sidebar = register_sidebar(array('name'=>'header'));

$sidebars_widgets = wp_get_sidebars_widgets();
$num_header_widgets = count($sidebars_widgets[$header_sidebar]);
}
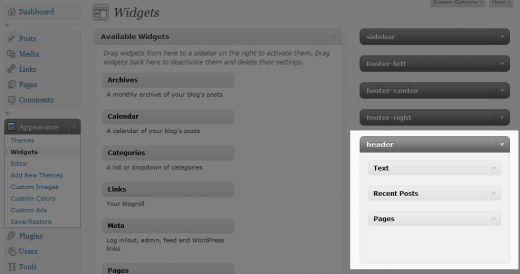
Doing so will make that new widget area available to you in your WordPress dashboard. You can check by logging into your WordPress blog, and going into the Appearance >> Widgets menu on the left.
Your new ‘header’ widget area should show up on the right of your screen. You can open it by clicking on it, and then drag and drop the widgets of your choice into it.
Note that lines 13 and 14 in the code above retrieves the number of widgets that are in your new widget area. You will need to use this later on.
2. Add the widget area to your WP theme
Go into the template header file (header.php) of your theme. Now you want to make your new widget area show up at your chosen location in your WordPress blog. Add the following HTML code to your header.php file where you want your widget area to appear –
header.php
<div id="header-widget">
	<div class="inner">
        	<?php dynamic_sidebar('header'); ?>
        </div>
</div> <!-- End header-widget -->
3. Style your widget area
Once you have added in your widget area you want to style it so that it looks clean and professional. As a start, add the new styles below into your WP theme style.css file.
style.css
#header-widget {
	width:750px;
	overflow:hidden;

}

#header-widget .inner {
	margin-top:20px;
	margin-bottom:20px;
}


#header-widget .inner li {
	list-style-type: none;
	list-style-image: none;
	float: left;

	border-top-style: solid;
	border-top-width:1px;

    	font-family: "lucida sans unicode","lucida grande",sans-serif;
	font-size: .7em;
	letter-spacing:1px;
}

#header-widget .inner li ul {
	padding-left:0px;
}

#header-widget .inner li ul li {
	width:100%;
	float:none;
	padding:0px; margin:0px;

	border-style:none;
	font-size: 100%;
}

4. Set the multiple column layout of your widget area
The code above just styles the individual widgets, you must still style your widget area so that it properly lays things out in a multi-column format. To do that, you need to add some dynamic styles into your WP theme functions.php file.
It is easiest to group all your dynamic styles into a function. For example in the code below, we put all our dynamic styles into a function called header_style.
functions.php
function header_style() {
	global $num_header_widgets;
?>
<style type="text/css">
#header-widget .inner li {
	<?php
		switch ($num_header_widgets) {
		case 1:
			echo "width: 90%;";
			echo "margin:0% 5% 0% 5%;";
			break;
		case 2:
			echo "width: 45%;";
			echo "margin:0% 2.5% 0% 2.5%;";
			break;
		default:
			echo "width: 29%;";
			echo "margin:0% 2% 0% 2%;";
			break;
		}
	 ?>
}
</style>
<?php
}
This header_style function will dynamically set your widget area to the right number of columns according to the number of widgets you have within it. If there is only one widget (e.g. case 1), we set the single column to 90% of the total width, together with a 5% margin on the left and right sides. If there are two widgets (e.g. case 2), we set each column to take up 45% of the total width, together with a 2.5% margin on the left and right sides of each column. Finally if there are three of more widgets (e.g. case default), we set each column to take up 29% of the total width, together with a 2% margin on the left and right sides of each column.
Ensure that the sum of column and margin widths add up to less than or equal to 100%. Otherwise, the columns will not be properly aligned. For example in the three column scenario, each column has a width of (29% + 2% + 2% = 33%). The total width therefore comes to (33% * 3 = 99%).
Notice that this is where we use the number of widgets data ($num_header_widgets) that we retrieved earlier on.
Now that we have defined our new dynamic styles, we just need to apply them to our WordPress blog. To do this we add the following code to our theme functions.php file.
add_action('wp_head', 'header_style');

5. Set your widget area to a fixed height
Now we have our multi-column layout, but notice that the height of our widget area is dynamic. I.e. it expands according to the size of the widgets we have placed within it. This may not be desirable, as it may push our other WP theme elements much farther down than we would like, or it may disrupt subsequent elements in our WP theme layout.
For these purposes, we may want to set our widget area to a fixed height. This can be easily achieved by adding the code below into the header_style function you just created –
#header-widget {
	<?php
	if ($num_header_widgets)
		echo "height:340px;";
	else
		echo "height:0px;";

	?>
}
This sets your widget area to a fixed height of 340 pixels if there are widgets within it. Otherwise, we set its height to zero. You can also use the max-height CSS property to set a maximum height instead of a fixed height.
As you see below, this cuts off any text overflow when our height limit is reached.

6. Add some bottom borders
Finally, we may want to enhance our widget area by adding a border to the bottom of our columns. To do this, add the following code to your header.php template file, right below where you added your header widget area.
header.php
<div id="header-border">
        <?php
            global $num_header_widgets;
            if ($num_header_widgets < 3) $num_borders = $num_header_widgets; else $num_borders = 3;
            for ($i=0; $i<  $num_borders; $i++) { ?>
                <div class="bottom-border"></div>
                <?php }
        ?>
</div>
Next, we need to style our bottom borders by adding the following code into our style.css theme file.
style.css
#header-border {
	width:750px;
}

#header-border .bottom-border {
	border-top-style: double;
	border-top-width:3px;
	float:left;
}
Finally, we need to set our border areas into the same multi-column format as we did with our widget area. To do this, add the code below into the header_style function within your functions.php file.
functions.php
#header-border .bottom-border {
	<?php
		switch ($num_header_widgets) {
		case 1:
			echo "width: 90%;";
			echo "margin:0% 5% 0% 5%;";
			break;
		case 2:
			echo "width: 45%;";
			echo "margin:0% 2.5% 0% 2.5%;";
			break;
		default:
			echo "width: 29%;";
			echo "margin:0% 2% 0% 2%;";
			break;
		}
	 ?>
}

Congratulations!
You are done creating your new multi-column widget-ready theme. Play around with the styling of borders, colors, background-colors, and more to get exactly the look that you want for your blog.
For an example of the multi-column widget area described in this article, check out the header widget at the top of this page. You can also get all the source code by just downloading the Shiba theme.
I’m searching for a solution like this one, and that’s a really well done article.
I wish to knew if it’s possible add an ordered number in
‘before_widget’ => ”
becouse I have to identify the last widget and change is css, to make tke widget aligned with the grid (i cannot have them aligned with percent)
In my Shiba Widgets plugin I have a section that looks for the last widget. It is in the shiba-widget-mcol.php file. Most of it is in the function widget, and function end_widget.
Can I make my widget a fixed height, rather than the widget area a fixed height? If so, how would I do that?
I would like to put in several rows of a widget and therefore want to keep them the same height so they align.
Thank you.
1. Identify your widget div.
2. Set the height of your widget div in CSS.
e.g. #my-widget-div { height: 100px; }
Doesn’t work with all themes. Destroyed Atahualpa.
Sounds like a CSS conflict issue. To make something like this work on certain themes, especially highly styled themes, some CSS and div adjustments are usually necessary.
Great tutorial. Thanks buddy
That is a great idea Andre. Now you got me stoked to work on the widgets plugin.
Hopefully I will get to start working on it this week.
Thanks Andre.
Good idea about making the multi-column widget into something standard that you can drag and drop.
It is on my list to create a Widgets plugin that allows people to create and assign different widget sets to different posts, pages, and galleries. For example, I usually want different widgets on my front-page compared to my posts. I may also want different widgets on my navigation pages and my galleries.
When I start writing this plugin I will definitely add in the multi-column widget.
Here is something to consider and it’s something I am amazed why no one has attempted it yet, but if you came up with a commercial widget (paid), you could do quite well with this idea…I’d do it myself but I am too busy with my site and designing for both Joomla and WP, but here goes:
Again, based on Joomla, have a widget that lets you enter in a custom style attribute in a field that would go into “any” widget like Widget Logic does. That one puts a form field at the bottom of every widget and you enter in WP Conditional Tags to publish it to select areas of your site. However, take this one step further and add another field where you can do what Joomla has for modules. You make a css style for a module, then with the module open, you can enter in the style you made. So if you did this in your style sheet: .module-blue and then open the module, add -blue to the field, that particular module will take on that module style of blue.
So the idea is to do this for WP widgets. I know it’s possible. Make this along with your method of dynamic width widgets here, you can do quite well if provided as a commercial widget ($) or at least get WordPRess to implement this into a future version and then give you credit for it.
The other option is… come up with one like this and I will utilize it within my themes along with your full credit for it. If interested, let me know.
Great functionality for widgets…however, how does one code in to change the heading tag from standard h2 to h3 or other? Plus, if one wanted to convert from li to divs…right now your method is based on the default WP widget styling.
lol…never mind, I figured it out. Anyway, awesome widget! It’s too bad WP developers don’t adopt your idea (and give credit) and make it standard. This works almost like Joomla’s template concept for modules (which I am well experienced with). I’ve been looking for something similar and a friend sent me your website link…I was like, yay!
lol – Thanks dohn. WordPress is a pretty awesome system. I just started looking into it, and I like it muy mucho! I will probably look into Blogger as well, but it would be difficult to beat WordPress.
This is very cool and useful (I barely got through reading this hub, as I kept on getting distracted by your CGI babe!). I’m still learning all of this and will have to bookmark your hub…Such great ideas, bro.