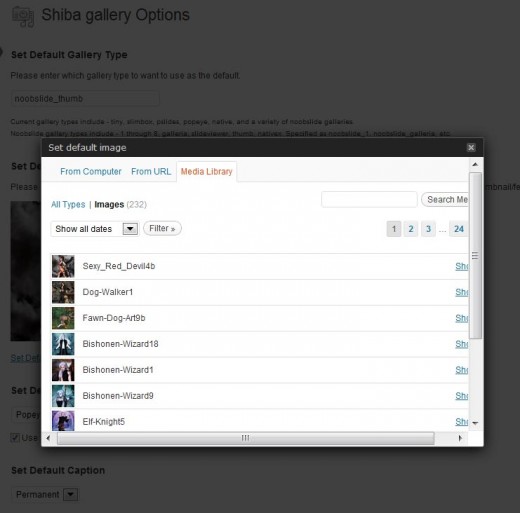
What is the media upload popup interface?
That is simply the popup window that appears when we click on the Add Media button ![]() (for adding images and video) while in the Edit Post screen.
(for adding images and video) while in the Edit Post screen.
The same interface is also currently being used for –
- Setting featured images in posts, and
- Setting header images in a theme.
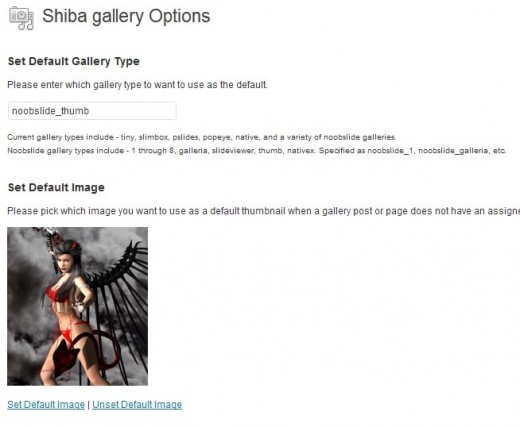
It can also be very useful in a plugin. For example, my Shiba Gallery plugin uses the Media Upload Interface to assign a default picture for posts and pages that do not have a user assigned featured image.

Here, we consider how to use the Media Upload Interface in our own plugin or theme.
1. Add Thickbox
The first step is to enable pop-up capability for the relevant plugin page(s). For example, my Shiba Gallery Plugin uses the interface in the Media >> Shiba Gallery page. Therefore, I enable pop-ups by adding the thickbox functionality to that page.
// Add to admin_menu action

// Add a new submenu
$my_page = add_media_page(__('Shiba Gallery', 'shiba_gallery'), __('Shiba Gallery', 'shiba_gallery'), 'administrator', 'shiba_gallery', 'my_plugin_page' );
add_action("admin_print_scripts-{$my_page}", 'my_plugin_page_scripts');
add_action("admin_print_styles-{$my_page}", 'my_plugin_page_styles');

function my_plugin_page_styles() {
	wp_enqueue_style('thickbox');
}

function my_plugin_page_scripts() {
	wp_enqueue_script('thickbox');
}
2. Associate Media Upload Interface with a Button or Link
Next, we want to add a button or link in our plugin page that calls up the Media Upload Interface.
<?php
$image_library_url = get_upload_iframe_src( 'image', null, 'library' );
$image_library_url = remove_query_arg( array('TB_iframe'), $image_library_url );
$image_library_url = add_query_arg( array( 'context' => 'shiba-gallery-default-image', 'TB_iframe' => 1 ), $image_library_url );
?>

<p>
<a title="Set default image" href="<?php echo esc_url( $image_library_url ); ?>" id="set-default-image" class="button thickbox">Set Default Image</a>
</p>
Line 8 associates the interface with a button. Alternatively, we can make it into a regular link by simply setting our link class to –
class="thickbox"

3. Set Our Own Tabs
Great! Now we have the Media Upload Interface associated to our own plugin page. However, we need to customize it to suit our needs.
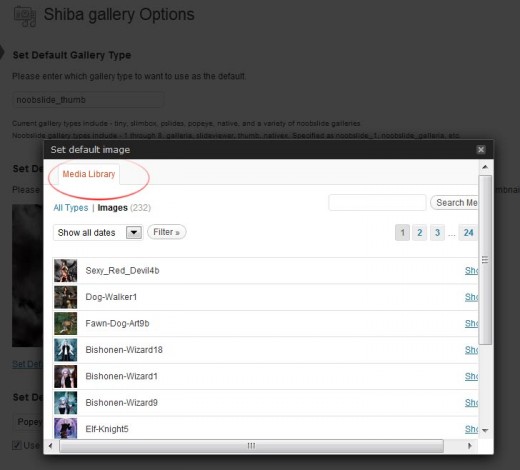
First, let us make things simple and only enable the library tab.
add_filter('media_upload_tabs', 'my_plugin_image_tabs', 10, 1);

function my_plugin_image_tabs($_default_tabs) {
	unset($_default_tabs['type']);
	unset($_default_tabs['type_url']);
	unset($_default_tabs['gallery']);

	return($_default_tabs);
}
The original $_default_tabs array looks like this –
Array
(
    [type] => From Computer
    [type_url] => From URL
    [library] => Media Library
    [gallery] => Gallery
)

4. Set Our Own Action
However, when we expand an image, we still get the default ‘Insert into Post’ button. To customize this action button, we need to hook into the attachment_fields_to_edit and media_send_to_editor filters.
- The attachment_fields_to_edit filter allows us to customize the button itself.
- The media_send_to_editor filter allows us to specify what steps to take when the image action button gets pressed.
add_filter('attachment_fields_to_edit', 'my_plugin_action_button', 20, 2);
add_filter('media_send_to_editor', 'my_plugin_image_selected', 10, 3);

function my_plugin_action_button($form_fields, $post) {

        $send = "<input type='submit' class='button' name='send[$post->ID]' value='" . esc_attr__( 'Use as Default' ) . "' />";

	$form_fields['buttons'] = array('tr' => "\t\t<tr class='submit'><td></td><td class='savesend'>$send</td></tr>\n");
	$form_fields['context'] = array( 'input' => 'hidden', 'value' => 'shiba-gallery-default-image' );
	return $form_fields;
}

function my_plugin_image_selected($html, $send_id, $attachment) {
	?>
	<script type="text/javascript">
	/* <![CDATA[ */
	var win = window.dialogArguments || opener || parent || top;

	win.jQuery( '#default_image' ).val('<?php echo $send_id;?>');
	// submit the form
	win.jQuery( '#shiba-gallery_options' ).submit();
	/* ]]> */
	</script>
	<?php
	exit();
}
Line 17 – Get the parent window (i.e. the Shiba Gallery Options window and not the pop-up).
Line 19 – Fill the default_image input attribute of our parent form with the image id selected in our media pop-up window.
Line 21 – Submit our parent form.
Line 25 – Exit so that we only perform our specified actions and none other.
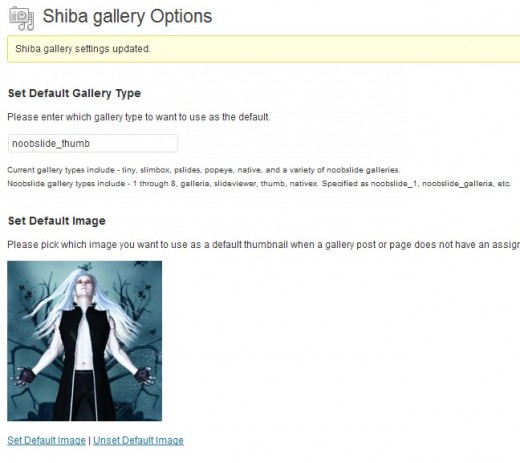
And just like that, we have changed our default image.

5. Only Apply Customization on Our Plugin Pop-up Window
There is still one fly left in the ointment. If we follow the process above, our customization will be applied every time the Media Upload Interface is used. This messes up our ability to insert images into posts, or to set featured images.
Therefore, we only want to apply our customization where it is relevant. To do this, we check to see that we are in the right context before adding in our customization filters.
// Add to admin_menu
if (check_upload_image_context('shiba-gallery-default-image')) {
        add_filter('media_upload_tabs', 'my_plugin_image_tabs', 10, 1);
        add_filter('attachment_fields_to_edit', 'my_plugin_action_button', 20, 2);
        add_filter('media_send_to_editor', 'my_plugin_image_selected', 10, 3);
}


function add_my_context_to_url($url, $type) {
	if ($type != 'image') return $url;
	if (isset($_REQUEST['context'])) {
		$url = add_query_arg('context', $_REQUEST['context'], $url);
	}
	return $url;
}

function check_upload_image_context($context) {
	if (isset($_REQUEST['context']) && $_REQUEST['context'] == $context) {
		add_filter('media_upload_form_url', array($this, 'add_my_context_to_url'), 10, 2);
		return TRUE;
	}
	return FALSE;
}
Hi there,
First of all sorry for dragging everyone back into an old discussion but I was wondering if anyone knows of any way of getting the search field to have focus (the caret to be inside the field) as soon as the media library window opens?
I have a LOT of images on a certain site and would like to be able to just start typing the name of an image as soon as the window opens in order to drill down the images shown.
Thanks in advance if anyone knows of any way of doing this.
Best wishes,
Mark
How Can I add PDF filter to this popup?
Hi,
Thanks for great tutorial. I would like to get the post-slug when user drops image into text area (WP 4.1.1) and upload thick box appears.
I’ve tried it using the filtering but the post slug does not get saved!
http://wordpress.stackexchange.com/questions/183196/why-does-post-slug-not-get-saved-for-drafts
Any help greatly appreciated
Gerry
Ooops… That meant to say: select class=”attachment-filters” -part – forgot to remove the brackets = )
Great tutorial – you have a very nice and understandable way of explaining things 🙂
I do have a question that I hope you’ll consider:
I’ve been searching for a couple of days now, for a way to filter the library view (in WP 3.5) to ONLY display media from the user (even when editor) but all snippets I’ve found fail for some reason. SO… Figured that if one can filter the library view from the dropdown, so only “media uploaded for this post” is displaying by default and nothing else, that it might do the trick.
Is this even possible – and if yes, do you know how?
Basically what I mean is from (when using firebug) the: .media-toolbar-secondary in the pop-up menu, then -part, to only display the (and thereby only the connected media to the specific post) and none of the rest from the dropdown?
Preferably for both editors and ordinary users alike, otherwise just for all, even admins if easier.
I would so much appreciate your help on this as I’m getting close to losing my mind 🙂
The thing with WordPress is that most things are possible, but what you describe may require a fair amount of work.
I am only starting to play around with the new media manager interface, so I don’t know all of its ins and outs yet. If I were to attempt what you describe, I would probably create a new javascript class that extends from the existing media.controller.Library class. It is in the media-views.js file.
Not sure at this point if this would be the best class, but it would be my current best guess.
Another possibility, is that there may be a way to hook into the existing ajax calls to return our own queries. This may be easier to do, but it would be more messy and difficult to maintain in the future.
🙂 … Found a way – for now at least
This into functions.php (wonder if it will show it here):
/* BACKEND ONLY SHOW POSTS OF CURRENT USER _ THAT*S NOT AN ADMIN */
add_action(‘pre_get_posts’, ‘filter_posts_list’);
function filter_posts_list($query)
{
//$pagenow holds the name of the current page being viewed
global $pagenow;
//$current_user uses the get_currentuserinfo() method to get the currently logged in user’s data
global $current_user;
get_currentuserinfo();
//Shouldn’t happen for the admin, but for any role with the edit_posts capability and only on the posts list page, that is edit.php
if(!current_user_can(‘administrator’) && current_user_can(‘edit_posts’) && (‘edit.php’ == $pagenow))
{
//global $query’s set() method for setting the author as the current user’s id
$query->set(‘author’, $current_user->ID);
$screen = get_current_screen();
add_filter(‘views_’.$screen->id, ‘remove_post_counts’);
}
}
function remove_post_counts($posts_count_disp)
{
//$posts_count_disp contains the 3 links, we keep ‘Mine’ and remove the other two.
unset($posts_count_disp[‘all’]);
unset($posts_count_disp[‘publish’]);
return $posts_count_disp;
}
… and then in my custom admin.css I added:
.media-frame-content .attachment-filters:first-child {
display:none;
}
Also, I spoke with Vladimir, the developer of the “User role editor” on the WP repository, and he then created this plugin that hides other users images, which can be useful for others (might as well add here, in case others are searching too):
http://wordpress.org/extend/plugins/view-own-posts-media-only/
🙂
Great to hear! Thanks for posting your solution.
Thanks Claire
I was looking for a solution of this type
Nice tutorial. good job. found what actually i want. Thanks. 🙂
Nice tutorial!
I was wondering if you could help me with a simple issue. I want the ‘media library’ to be the default tab; meaning that it is the one that opens up if the user clicks on the add media button. Is it possible?
You will have to add “&tab=library” into the add media button link.