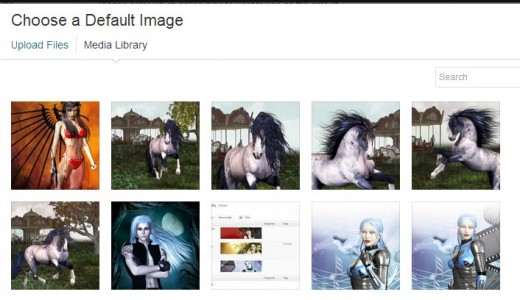
One of the really cool updates for WordPress 3.5 is the new media manager interface. In addition to using this interface for uploading images, creating galleries, and inserting media into posts, it is also useful for a variety of other operations, for example adding featured images, picking theme header images, and more.
As such the Media Manager can also be very useful for customized administrative operations in our blog. Here, we explore how we can add the media manager interface to our own plugin or theme.

1. Add Relevant Javascript
The previous media manager uses thickbox and was a lot more complicated to add. The new WordPress 3.5 media manager only requires two calls to include all of the relevant javascript operations.
// Include in admin_enqueue_scripts action hook
wp_enqueue_media();
wp_enqueue_script( 'custom-header' );
The wp_enqueue_media function call does most of the work for us. It sets up all the relevant settings, localizes menu text, and loads in all the appropriate javascript files.
The custom-header script creates an image selection frame, and ties it to an interface element, for example a button or link. It then calls a url or our choice with the selected image id. This is the same script that is used when selecting theme custom header images.
2. Add the Media Manager Button or Link
Now, all we need to do is add in a button or link to activate the media manager popup window.
<?php
$modal_update_href = esc_url( add_query_arg( array(
	'page' => 'shiba_gallery',
	'_wpnonce' => wp_create_nonce('shiba_gallery_options'),
), admin_url('upload.php') ) );
?>

<p>
<a id="choose-from-library-link" href="#"
	data-update-link="<?php echo esc_attr( $modal_update_href ); ?>"
	data-choose="<?php esc_attr_e( 'Choose a Default Image' ); ?>"
	data-update="<?php esc_attr_e( 'Set as default image' ); ?>"><?php _e( 'Set default image' ); ?>
</a> |
</p>

Line 9 – Our button or link id must be set to ‘choose-from-library-link’. This is the id that is looked for in the custom-header javascript file.
Line 10 – The data-update-link attribute contains the url we want to call with the selected image id. This is usually the url of the page that contains our media manager button.
Line 11 – The data-choose attribute contains the title of the image selection menu.
Line 12 – The data-update attribute contains the name of the image selection button.
For example, we have used the code above to add a Set default image link to our Shiba Gallery plugin options page (shown on the right). Clicking the link will open up the media manager interface shown below.
Note that the title of the frame (‘Choose a Default Image’) is passed through from the data-choose attribute and the name of the button (‘Set as default image’) is passed through from the data-update attribute.

3. Define Action Function
Finally, we need to add in some code for processing the image id that we will pass to our data-update-link url.
// Add to the top of our data-update-link page
if (isset($_REQUEST['file'])) {
	check_admin_referer("shiba_gallery_options");

        // Process and save the image id
	$options = get_option('shiba_gallery_options', TRUE);
	$options['default_image'] = absint($_REQUEST['file']);
	update_option('shiba_gallery_options', $options);
}
Line 2 – The image id gets passed in through using the ‘file’ attribute, in the destination url. Here, we check if it is set.
Line 3 – Do a security check here based on the ‘_wpnonce’ attribute that we added earlier to our destination url.
Lines 5 to 8 – Save the selected image id as our default gallery image.
And that is it! We have included the new WordPress media manager interface into our own plugin.
i am getting “You do not have sufficient permissions to access this page.” when I hit submit. Any advice?
How would you program the ‘Unset Default Image’ action ?
Thanks,
John
Great tutorial. I want to eventually add a gallery to a page and I see you handle that in part two. I have seem to become stopped though, as when I actually select an image for upload the page refreshes and goes to “You do not have sufficient permissions to access this page.”
What could I be missing? I’m using WP4 but I hope that isn’t the issue!
Do you know how to display the “filter” select in the media manager window? I’ve tried with filterable: ‘all’ (and other values) but it dosen’t work.
Hi, thanks for the guide, any suggestion about how to add multiple images instead on just one?
I talk about that in part2
http://shibashake.com/wordpress-theme/how-to-add-the-wordpress-3-5-media-manager-interface-part-2
Hi there
Do you know how I can add this functionality multiple times on a single page? Im making a custom settings page and want a few pre-defined image selectors like the one in the demo here.
I did this on one of my themes by tying the “click” action to a class rather than an id. Then I can just have multiple buttons tied to that class.
Would it be possible for you to show an example of that? I’ve been fighting with this for days now and just can’t get it to work.
The script I’m using is made by Thomas Griffin – github.com/thomasgriffin/New-Media-Image-Uploader
Nevermind, got it to work!
Thanks for the post, however i am a bit confused on where i am adding this in my plugin. My end goal is to add a image selection to custom taxonomy, for my custom post type. So i have taxonomy featured images. Any direction you can give would be great!
I add the enqueue_scripts function calls using the admin_enqueue_scripts action hook.
I add the HTML code on the page where I want the Media Manager button to appear.
I add the action function at the top of the same page as my Media Manager button.